Front Yard Renovation
- Porch & Rose

- Apr 29, 2024
- 4 min read

When we bought our home, we knew it needed some love. Not only did the interior need a refresh, but our front yard needed a makeover as well. A majority of our yard was overgrown shrubs and tree branches that needed some serious pruning. On top of that, half of our lawn had exposed tree roots, which made it a challenge to mow the grass. This was a yard that appeared simple to maintain to the naked eye, but up close, it was just a disaster. That said, we didn't buy this house for the front yard. We bought it for the curb appeal. And by curb appeal, I mean, the exterior needed very little work. This allowed us to focus solely on the front yard, and enhance its character to its true potential.
Before


First and foremost
We removed the overgrown monkey grass, trimmed the shrubs and bushes, and pruned back the tree branches. This step, alone, will bring a dramatic transformation in very little time with very little money.
The Power of Pea Gravel
Pea Gravel is a great material. It's relatively cheap considering it's rock, and it provides great benefits to your home. It's a natural pest resistance material and a natural drainage system that will help move water away from the home, if sloped correctly. If you have a basement like us, laying pea gravel along the perimeter will eliminate any water build-up that could potentially soak into the ground and affect the retaining walls.
We removed the existing pine straw, and used rubber edging on the grass to lay out the design for the pea gravel. We took advantage of the existing sidewalk and used it as an edging for the pea gravel, so there was no need to add rubber edging here. Once all the pine straw was removed, we cleared out all excess weeds and applied a weed barrier mat, which can be found online or at your local gardening center. Follow the manufacturer instructions for properly anchoring the mat.
If you have extra building material, such as brick, this could be a great opportunity to use it as a sidewalk border. As we were clearing out our side yard, we discovered a stack of brick not being used, and decided to give it a new purpose as a sidewalk liner.
Once the weed barrier mat has been properly anchored, it's time to spread the pea gravel. I prefer a depth of two inches. This allows for natural movement of the gravel without exposing any mat or roots. All manufacturer websites have a great calculation tool to determine how much pea gravel you need for your project. Our front yard renovation required 6 tons of pea gravel. Simply grab a shovel and start spreading it out.
My Tip for Ordering
Instead of making trip after trip to your local gardening center to buy several bags of pea gravel, I recommend ordering from a landscape supplier with a delivery service. It typically requires a delivery fee, but the convenience and savings on gas is well worth the fee.


The Focal Point
Before we touched the grass, we needed to define the focal point that would be the primary feature of the front yard. For us, this was the space between two, twin trees that are centered with our front porch. We knew this was the heart of the front yard and with that honor, it should have a little extra character than the rest of the yard. Since we had extra material from the pea gravel beds, we chose to use the remaining rubber edging and pea gravel to define a small walking path off the side walk that would lead you to a shaded DIY patio. This DIY patio consists of only rocks, stones, and fire brick that we found around our property. We simply arranged the materials into a pattern and filled the joints with patio sand, which can be purchased from your local gardening center.


Defining the Zones
We knew we needed to compartmentalize our front yard into two separate zones: the mow-able zone vs. non-mow-able zone. All of the exposed tree roots were focused on the right side of our front yard, so we created a pebble border to visually separate the two zones. We selected the MSI Imperial Pebbles at Home Depot that are about one to two inches in size.


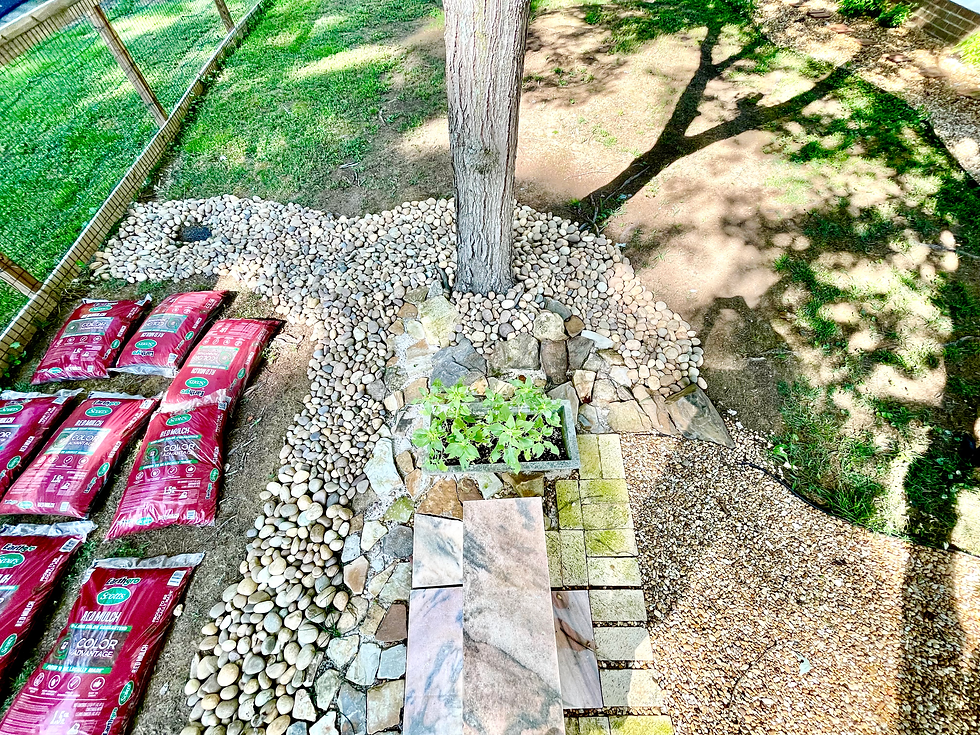

Thank you very Mulch
Now, it was time to lay the mulch on the non-mow-able zone of our front yard. We chose a red mulch to compliment the color of the brick, and while red can be a very bright and bold color, we found that Scott's Red Mulch has a nice balance between red and brown. It's more of a burnt red. In addition, mulch provides great benefits to any yard because it naturally suppresses weeds, protects soil erosion, extends water availability for the soil, and can even moderate extreme temperatures, which is needed during those hot summer months.
We hope you found this renovation project helpful, and encourage you to transform your front yard into something breathtaking and beautiful that will keep the neighbors talking.
Happy Yard Work!